Hướng dẫn tạo thanh toán Paypal với Spring Boot + Thymeleaf
Nếu bạn chưa biết về phương thức thanh toán qua Paypal thì chúng ta tìm hiểu chút về phương thức thanh toán qua Paypal nhé!
1. Paypal là gì?
2. Có mấy loại tài khoản tại Paypal – đọc thêm
3. Yêu cầu project Paypal payment
Sau đây là một số thứ cần có trước khi bắt tay vào lập trình thanh toán Paypal với Spring Boot và Thymeleaf engine.
Yêu cầu quan trọng:
- Bạn đã có tài khoản Paypal. Nếu chưa có hãy tìm hiểu cách đăng kí Paypal trên mạng nhé! Trong quá trình đăng kí Paypal gặp khó khăn hãy comment bên dưới nhé!
Các công nghệ sử dụng:
- Spring Boot
- Thymeleaf engine
- Paypal SDK for JAVA
Các công cụ phần mềm cần:
- JDK 1.8 or later
- Maven 3 or later
- Eclipse + Plugin spring suite tool (STS)
Để làm được Project này chúng ta có 2 giai đoạn: Tạo app trên developer.paypal.com và code project spring boot thôi 😀
4. Tạo app trên developer.paypal.com
Đầu tiên chúng ta tạo app trên developer.paypal.com để lấy Client ID và Secret App
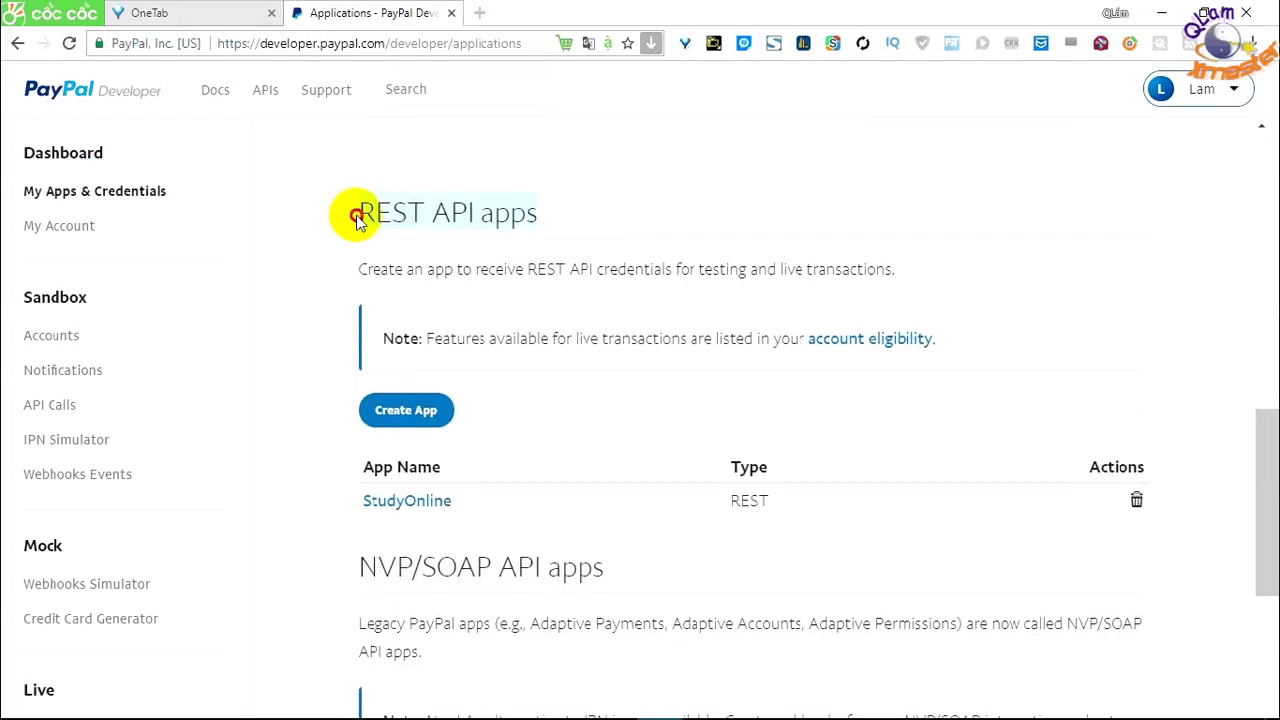
Đăng nhập vào https://developer.paypal.com/
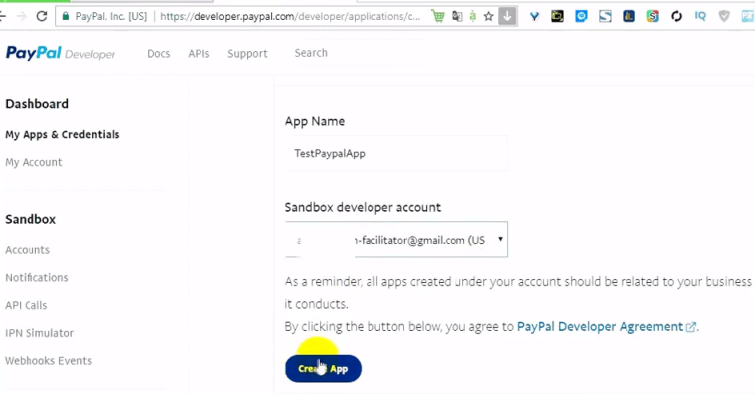
Vào Dashboard, Chọn Create App
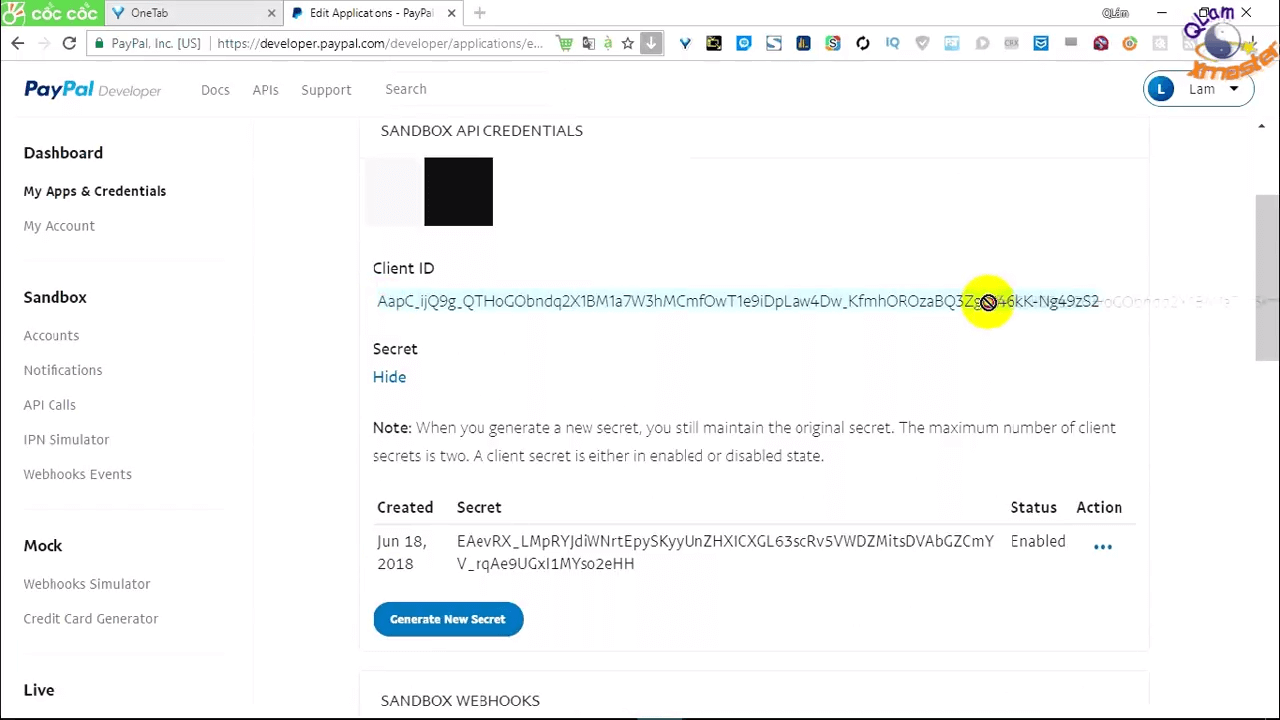
Sau khi tạo app xong chúng ta sẽ được Client ID và Secret của app đó.
Sau đây mình sẽ Hướng dẫn lập trình thanh toán Paypal với Spring Boot và Thymeleaf engine.
5. Tạo project Spring Boot + Thymeleaf với STS tool
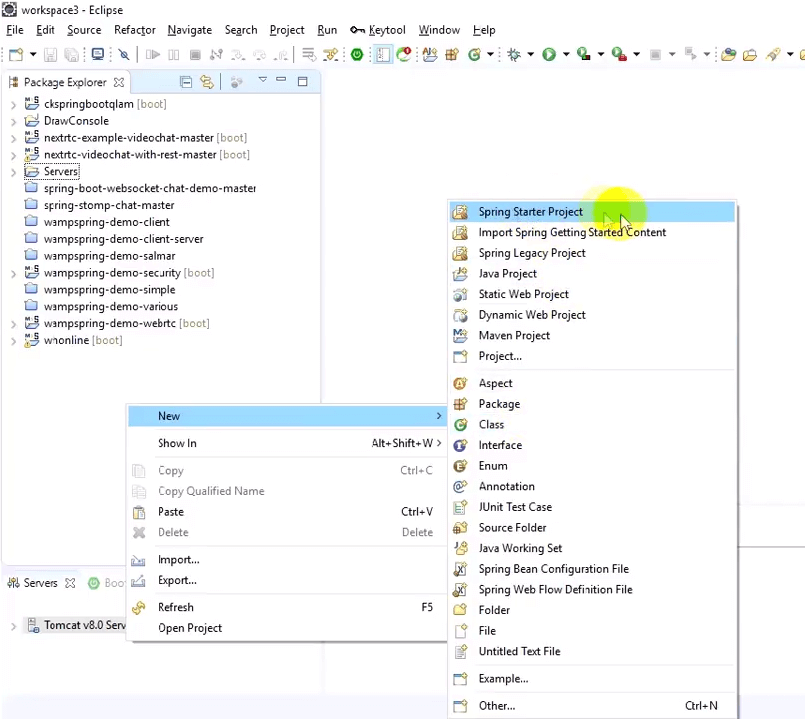
Tạo project Spring Boot Starter
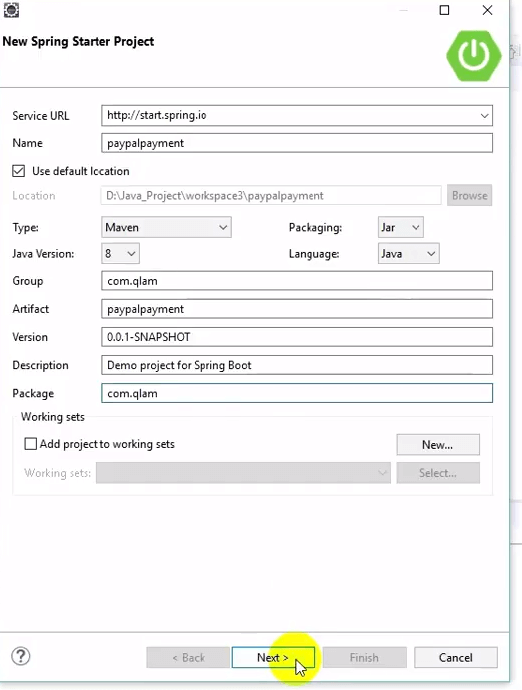
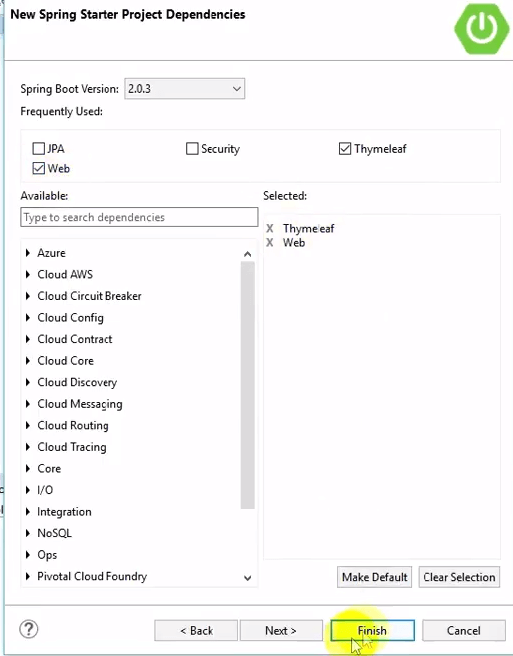
Chọn như hình:
Copy ClientID và SerectID vào File application.properties
server.port: 8080
spring.thymeleaf.cache=false
#Paypal config
paypal.mode=sandbox
paypal.client.app=xxx-yourcode
paypal.client.secret=xxx-yourcode
Tạo các package: com.qlam.config, com.qlam.controller, com.qlam.service, com.qlam.utils
File pom.xml
<?xml version="1.0" encoding="UTF-8"?>
<project xmlns="http://maven.apache.org/POM/4.0.0" xmlns:xsi="http://www.w3.org/2001/XMLSchema-instance"
	xsi:schemaLocation="http://maven.apache.org/POM/4.0.0 http://maven.apache.org/xsd/maven-4.0.0.xsd">
	<modelVersion>4.0.0</modelVersion>
	<groupId>com.qlam</groupId>
	<artifactId>paypalpayment</artifactId>
	<version>0.0.1-SNAPSHOT</version>
	<packaging>jar</packaging>
	<name>paypalpayment</name>
	<description></description>
	<parent>
		<groupId>org.springframework.boot</groupId>
		<artifactId>spring-boot-starter-parent</artifactId>
		<version>2.0.3.RELEASE</version>
		<relativePath/> <!-- lookup parent from repository -->
	</parent>
	<properties>
		<project.build.sourceEncoding>UTF-8</project.build.sourceEncoding>
		<project.reporting.outputEncoding>UTF-8</project.reporting.outputEncoding>
		<java.version>1.8</java.version>
	</properties>
	<dependencies>
		<dependency>
			<groupId>org.springframework.boot</groupId>
			<artifactId>spring-boot-starter-web</artifactId>
		</dependency>
		<dependency>
			<groupId>org.springframework.boot</groupId>
			<artifactId>spring-boot-starter-test</artifactId>
			<scope>test</scope>
		</dependency>
		<dependency>
			<groupId>org.springframework.boot</groupId>
			<artifactId>spring-boot-starter-thymeleaf</artifactId>
		</dependency>
		<dependency>
			<groupId>com.paypal.sdk</groupId>
			<artifactId>rest-api-sdk</artifactId>
			<version>1.4.2</version>
		</dependency>
	</dependencies>
	<build>
		<plugins>
			<plugin>
				<groupId>org.springframework.boot</groupId>
				<artifactId>spring-boot-maven-plugin</artifactId>
			</plugin>
		</plugins>
	</build>
</project>
Tạo class PaypalConfig.java trong package com.qlam.config
package com.qlam.config;
import java.util.HashMap;
import java.util.Map;
import org.springframework.beans.factory.annotation.Value;
import org.springframework.context.annotation.Bean;
import org.springframework.context.annotation.Configuration;
import com.paypal.base.rest.APIContext;
import com.paypal.base.rest.OAuthTokenCredential;
import com.paypal.base.rest.PayPalRESTException;
@Configuration
public class PaypalConfig
	@Value("$paypal.client.app")
 private String clientId;
	@Value("$paypal.client.secret")
 private String clientSecret;
	@Value("$paypal.mode")
 private String mode;
	@Bean
	public Map<String, String> paypalSdkConfig()
		Map<String, String> sdkConfig = new HashMap<>();
		sdkConfig.put("mode", mode);
		return sdkConfig;

	@Bean
	public OAuthTokenCredential authTokenCredential()
		return new OAuthTokenCredential(clientId, clientSecret, paypalSdkConfig());

	@Bean
	public APIContext apiContext() throws PayPalRESTException
		APIContext apiContext = new APIContext(authTokenCredential().getAccessToken());
		apiContext.setConfigurationMap(paypalSdkConfig());
		return apiContext;
Tạo enum PaypalPaymentIntent.java trong package com.qlam.config
package com.qlam.config;
public enum PaypalPaymentIntent
	sale, authorize, order
Tạo enum PaypalPaymentMethod.java trong package com.qlam.config
package com.qlam.config;
public enum PaypalPaymentMethod
	credit_card, paypal
Tạo class Utils.java trong package com.qlam.utils
package com.qlam.util;
import javax.servlet.http.HttpServletRequest;
public class Utils
	public static String getBaseURL(HttpServletRequest request)
	 String scheme = request.getScheme();
	 String serverName = request.getServerName();
	 int serverPort = request.getServerPort();
	 String contextPath = request.getContextPath();
	 StringBuffer url = new StringBuffer();
	 url.append(scheme).append("://").append(serverName);
	 if ((serverPort != 80) && (serverPort != 443))
	 url.append(":").append(serverPort);

	 url.append(contextPath);
	 if(url.toString().endsWith("/"))
	 	url.append("/");

	 return url.toString();
Tạo class PaypalService.java trong package com.qlam.service
package com.qlam.service;
import java.util.ArrayList;
import java.util.List;
import org.springframework.beans.factory.annotation.Autowired;
import org.springframework.stereotype.Service;
import com.paypal.api.payments.Amount;
import com.paypal.api.payments.Payer;
import com.paypal.api.payments.Payment;
import com.paypal.api.payments.PaymentExecution;
import com.paypal.api.payments.RedirectUrls;
import com.paypal.api.payments.Transaction;
import com.paypal.base.rest.APIContext;
import com.paypal.base.rest.PayPalRESTException;
import com.qlam.config.PaypalPaymentIntent;
import com.qlam.config.PaypalPaymentMethod;
@Service
public class PaypalService
	@Autowired
	private APIContext apiContext;
	public Payment createPayment(
			Double total,
			String currency,
			PaypalPaymentMethod method,
			PaypalPaymentIntent intent,
			String description,
			String cancelUrl,
			String successUrl) throws PayPalRESTException
		Amount amount = new Amount();
		amount.setCurrency(currency);
		amount.setTotal(String.format("%.2f", total));
		Transaction transaction = new Transaction();
		transaction.setDescription(description);
		transaction.setAmount(amount);
		List<Transaction> transactions = new ArrayList<>();
		transactions.add(transaction);
		Payer payer = new Payer();
		payer.setPaymentMethod(method.toString());
		Payment payment = new Payment();
		payment.setIntent(intent.toString());
		payment.setPayer(payer);
		payment.setTransactions(transactions);
		RedirectUrls redirectUrls = new RedirectUrls();
		redirectUrls.setCancelUrl(cancelUrl);
		redirectUrls.setReturnUrl(successUrl);
		payment.setRedirectUrls(redirectUrls);
		apiContext.setMaskRequestId(true);
		return payment.create(apiContext);

	public Payment executePayment(String paymentId, String payerId) throws PayPalRESTException
		Payment payment = new Payment();
		payment.setId(paymentId);
		PaymentExecution paymentExecute = new PaymentExecution();
		paymentExecute.setPayerId(payerId);
		return payment.execute(apiContext, paymentExecute);
Tạo class PaymentController.java trong package com.qlam.controller
package com.qlam.controller;
import javax.servlet.http.HttpServletRequest;
import org.slf4j.Logger;
import org.slf4j.LoggerFactory;
import org.springframework.beans.factory.annotation.Autowired;
import org.springframework.stereotype.Controller;
import org.springframework.web.bind.annotation.GetMapping;
import org.springframework.web.bind.annotation.PostMapping;
import org.springframework.web.bind.annotation.RequestParam;
import com.paypal.api.payments.Links;
import com.paypal.api.payments.Payment;
import com.paypal.base.rest.PayPalRESTException;
import com.qlam.config.PaypalPaymentIntent;
import com.qlam.config.PaypalPaymentMethod;
import com.qlam.service.PaypalService;
import com.qlam.util.Utils;
@Controller
public class PaymentController
	public static final String URL_PAYPAL_SUCCESS = "pay/success";
	public static final String URL_PAYPAL_CANCEL = "pay/cancel";
	private Logger log = LoggerFactory.getLogger(getClass());
	@Autowired
	private PaypalService paypalService;
	@GetMapping("/")
	public String index()
		return "index";

	@PostMapping("/pay")
	public String pay(HttpServletRequest request,@RequestParam("price") double price )
		String cancelUrl = Utils.getBaseURL(request) + "/" + URL_PAYPAL_CANCEL;
		String successUrl = Utils.getBaseURL(request) + "/" + URL_PAYPAL_SUCCESS;
		try
			Payment payment = paypalService.createPayment(
					price,
					"USD",
					PaypalPaymentMethod.paypal,
					PaypalPaymentIntent.sale,
					"payment description",
					cancelUrl,
					successUrl);
			for(Links links : payment.getLinks())
				if(links.getRel().equals("approval_url"))
					return "redirect:" + links.getHref();


		 catch (PayPalRESTException e)
			log.error(e.getMessage());

		return "redirect:/";

	@GetMapping(URL_PAYPAL_CANCEL)
	public String cancelPay()
		return "cancel";

	@GetMapping(URL_PAYPAL_SUCCESS)
	public String successPay(@RequestParam("paymentId") String paymentId, @RequestParam("PayerID") String payerId)
		try
			Payment payment = paypalService.executePayment(paymentId, payerId);
			if(payment.getState().equals("approved"))
				return "success";

		 catch (PayPalRESTException e)
			log.error(e.getMessage());

		return "redirect:/";
Tạo các file view html với thymeleaf engine
Trong src/main/resourse/templates
Tạo file index.html
<!DOCTYPE html>
<html>
<head>
<meta charset="UTF-8" />
<title>Paypal Payment with Spring Boot - ShareEverythings.com</title>
</head>
<body>
<h1>Paypal Payment with Spring Boot - ShareEverythings.com</h1>
<form method="post" th:action="@/pay">
	<input type="text" value="5" name="price" />
	<button type="submit"> Payment with Paypal </button>
</form>
</body>
</html>
Tạo file success.html
<!DOCTYPE html>
<html>
<head>
<meta charset="UTF-8" />
<title>Paypal Payment with Spring Boot - ShareEverythings.com</title>
</head>
<body>
	<h1>Payment Success !</h1>
	<a href="/" >Go Home</a>
</body>
</html>
Taọ file cancel.html
<!DOCTYPE html>
<html>
<head>
<meta charset="UTF-8" />
<title>Paypal Payment with Spring Boot - ShareEverythings.com</title>
</head>
<body>
	<h1>Canceled by user</h1>
	<a href="/" >Go Home</a>
</body>
</html>
Xong Run APP lên thôi ! Chạy project với Spring Boot App nhé
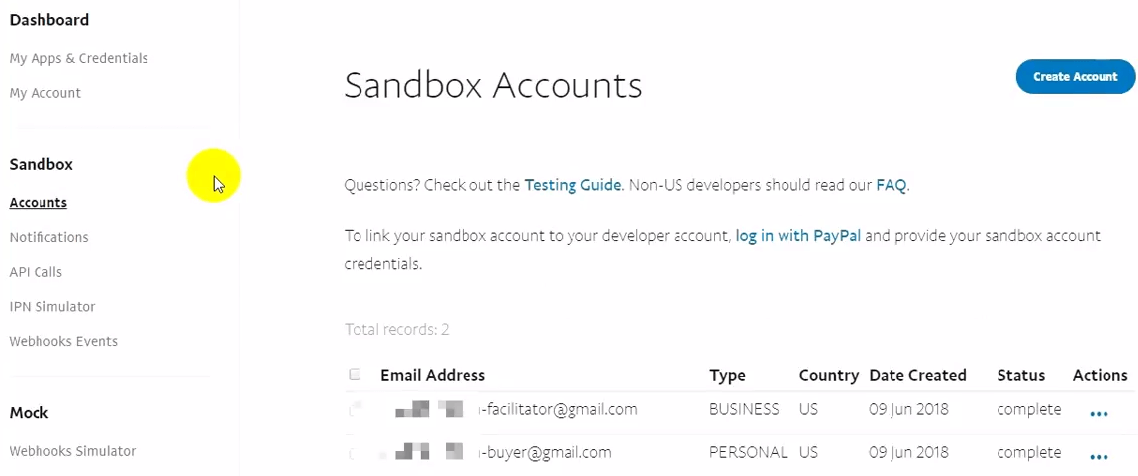
Lưu ý: chúng ta cần tài khoản ảo tức là sandbox để test project này.
Vào sandbox > account bạn sẽ thấy có 2 tài khoản dạng thế này:
xxx-facilitator@xxx : loại tài khoản doanh nghiệp
xxx-buyer@xxx : loại tài khoản cá nhân
Bạn nên đổi password trong Profile các tài khoản trên. Ngoài ra trong mục Profile còn nhiều phần khác nữa, bạn hãy tự khám phá nhé!
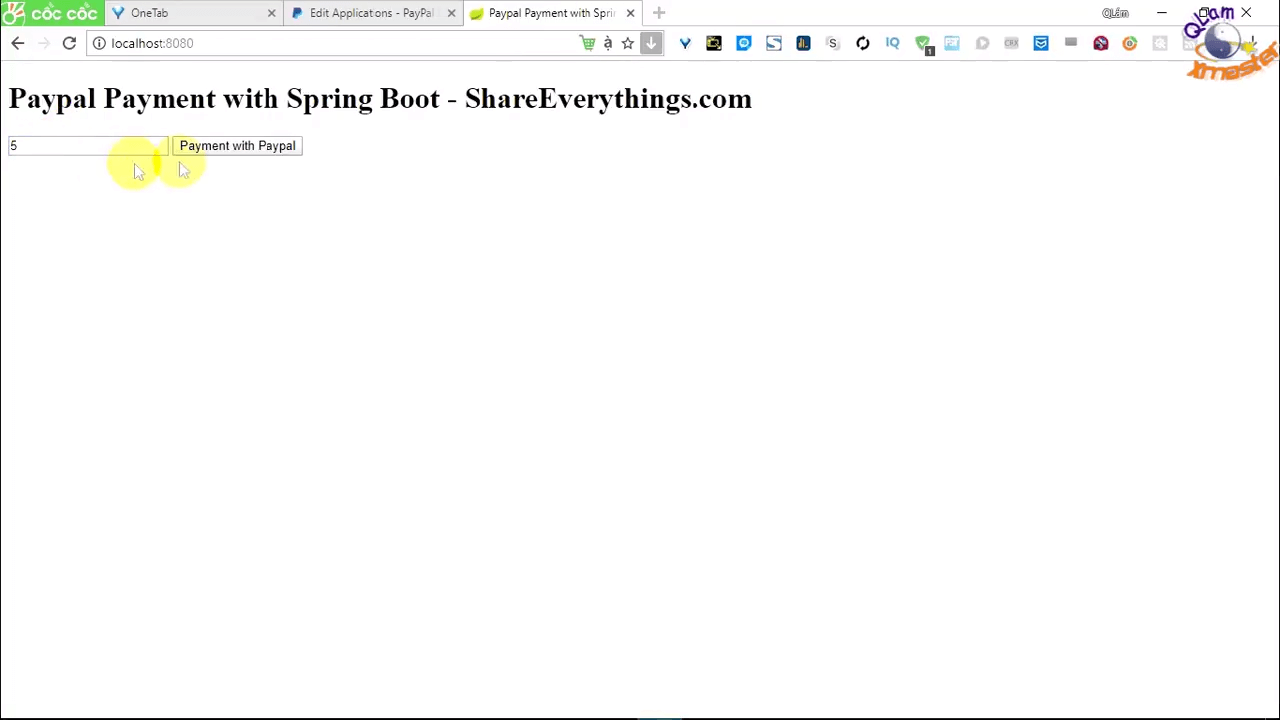
Xong. Chúng ta test app nào! Bạn hãy nhập số tiền sau đó nhấn Payment With Paypal
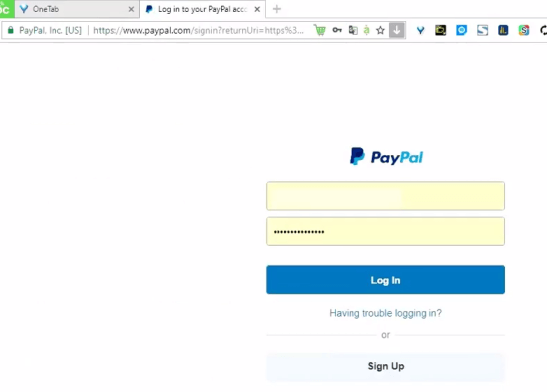
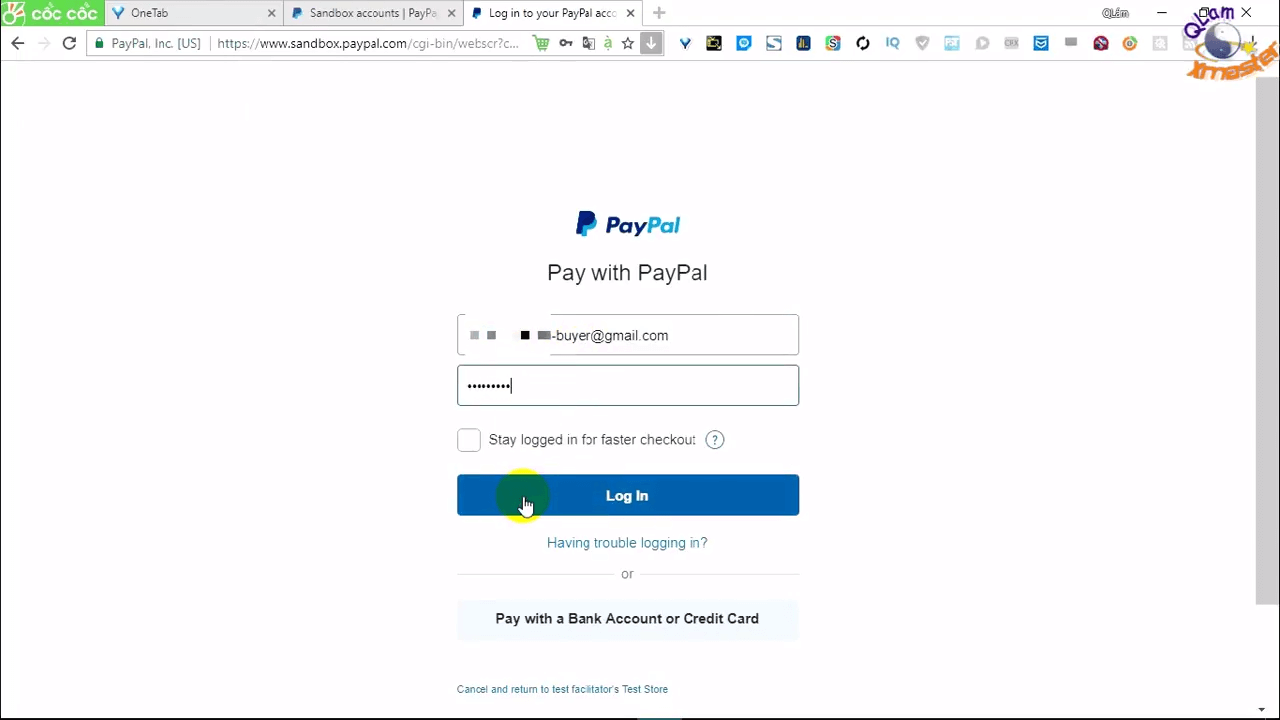
Nó sẽ chuyển hướng sang trang đăng nhập vào paypal để thanh toán
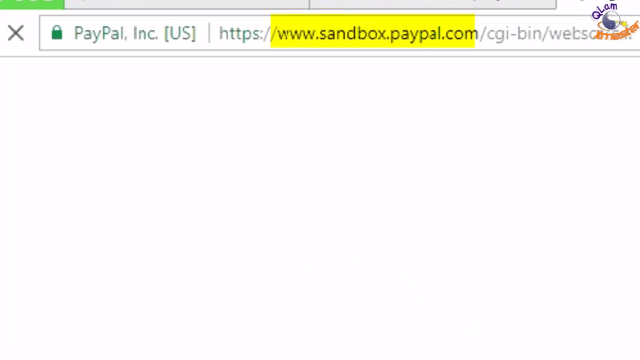
Lưu ý: đây là trang sandbox.paypal trang này tiền ảo nhé(tiền này không phải của bạn đâu 😀 )
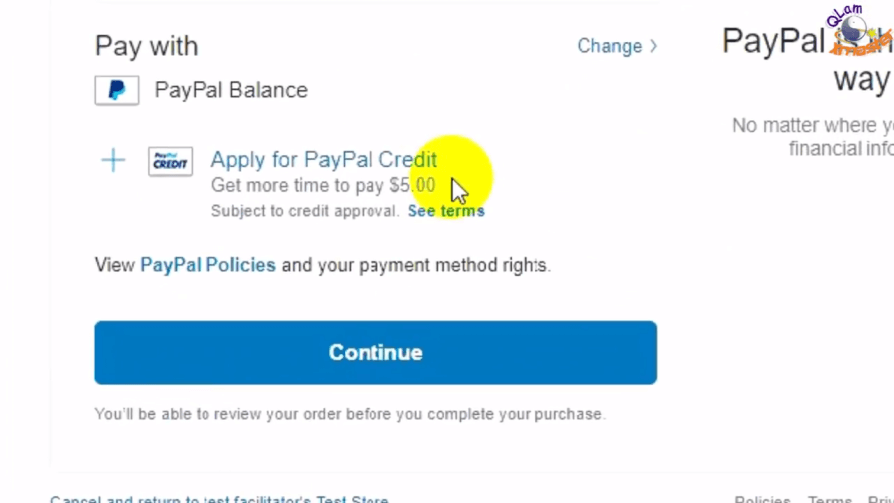
Trang xác nhận thanh toán
Nếu bạn thanh toán thành công nó sẽ chuyển sang trang success
Nếu bạn không muốn thanh toán thì nhấn link cancel phía dưới khung login. Nó sẽ chuyển sang trang cancel
Video Hướng dẫn thanh toán Paypal với Spring Boot + Thymeleaf chi tiết:
Tải source code
Xong, thắc mắc gì bạn hãy nhận xét phía dưới!
Học hành, Lập trình, Spring Framework
Java, Lập trình



0 comments:
Post a Comment